Zoom at OsloMet
About Zoom
Zoom works well for digital teaching and is a good alternative to Teams for larger, internal meetings and video conferences with up to 300 participants.
- OsloMet has taken precautions regarding the safety of Zoom. It is important that you always update to the latest version.
- You can also get help in the Teams group OsloMet User Forum / Zoom. This is not a valid first line og support, but a place where you can ask questions and share experiences with your colleagues.
- In DIGIN's guides you will find many tips on Zoom for teaching (instructure.com, in Norwegian), including Break-out rooms, recording of lessons and everything we have discussed above.
- Follow the OsloMet Academy where courses are run on Zoom and online teaching.
-
Install the Zoom client
-
Go to https://oslomet.zoom.us/.
-
Click "Sign in". Use your OsloMet username and password to log in.
-
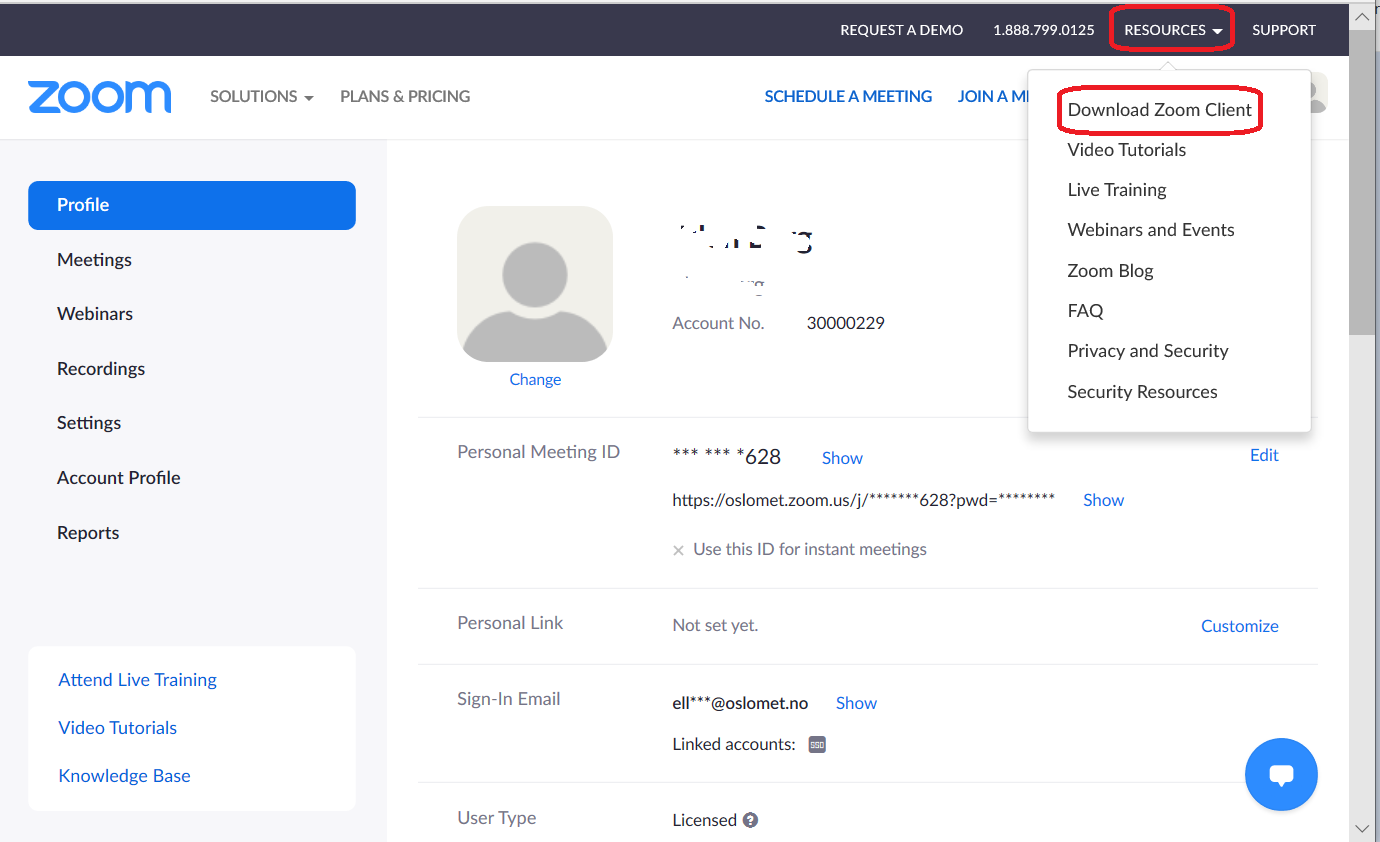
Click "Resources" in the upper right corner and then "Download Zoom Client".
-
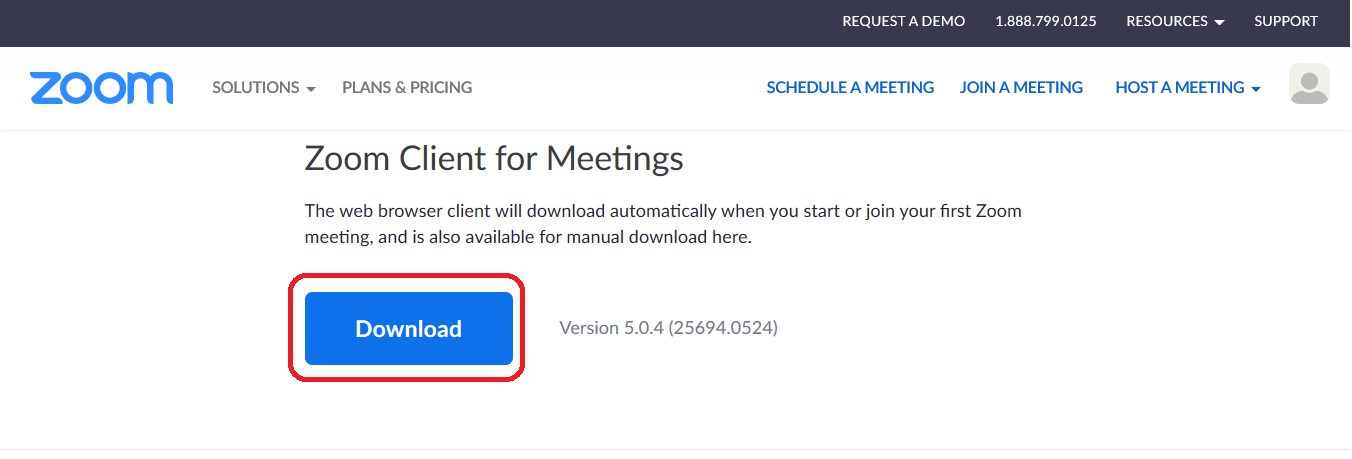
Click "Download" under "Zoom Client for Meetings".
-
Follow the steps on the screen until the installation is complete.
-
Search for and open Zoom or start Zoom from the desktop.
-
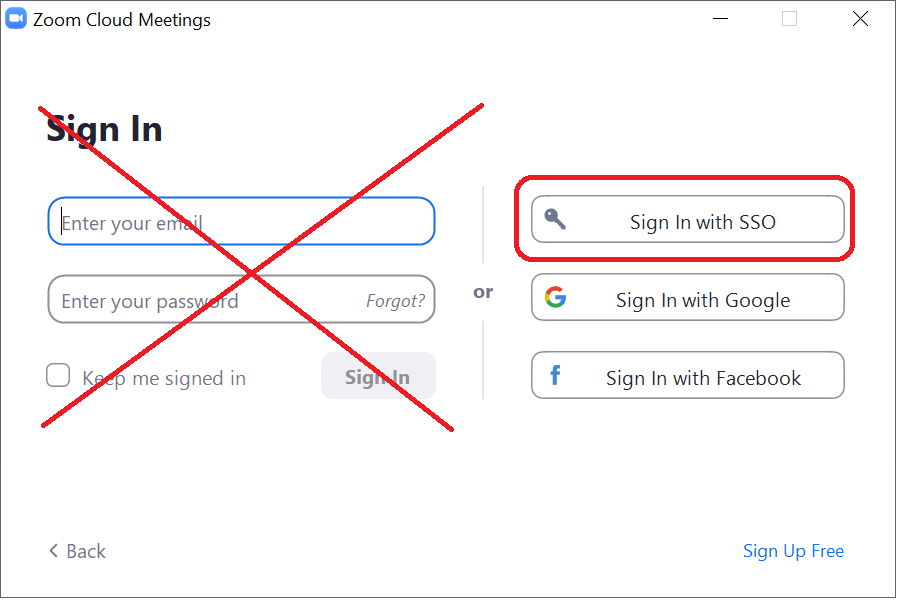
Click "Sign in with SSO".
-
-
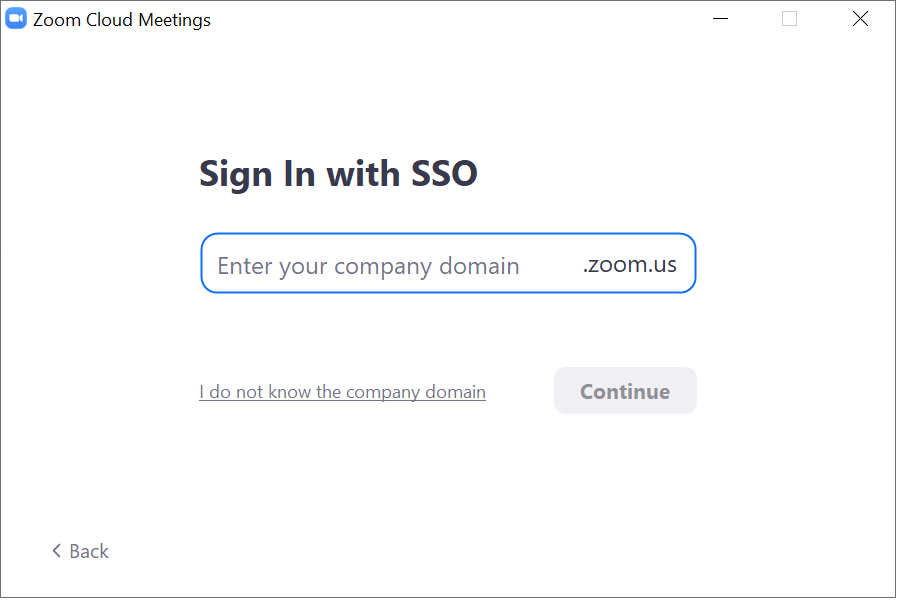
Enter «oslomet» in the field with "Enter your company domain". Then click "Continue".
-
Zoom is now installed and ready to use.
-
-
Update Zoom
Start Zoom.
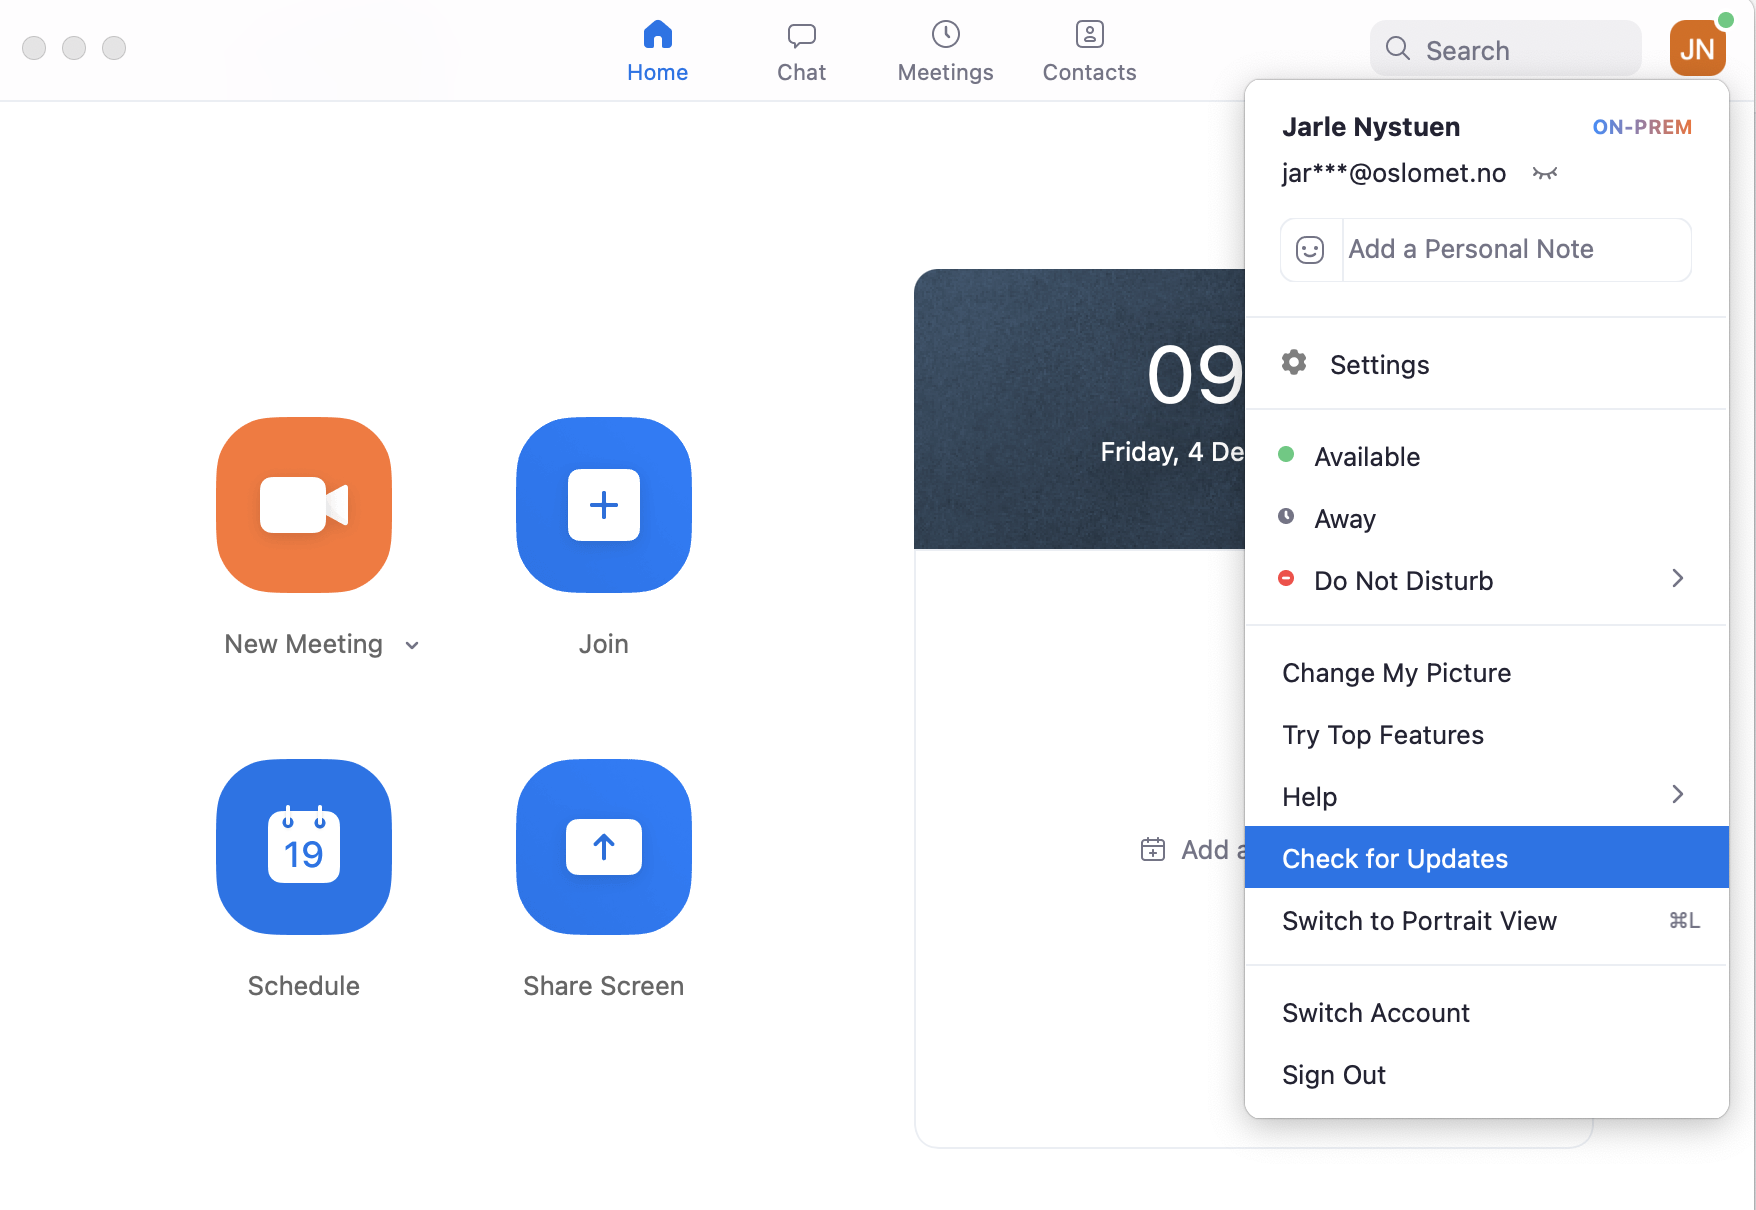
- Click the profile button in the upper right corner and then click "Check for Updates".
-
In case of problems, please contact IT Service Desk (itservicedesk@oslomet.no | tlf. 67 23 55 55 | IT-servicedesk)
- Click the profile button in the upper right corner and then click "Check for Updates".
-
Hold a meeting in Zoom
NB! Before starting the meeting:
It is an advantage to close all programs that you do not need. This includes Teams and Skype.
Make sure no unauthorized person has access to the screen during the call or can hear audio from the call. Use headphones where practicable.
- Open Zoom and click "Start".
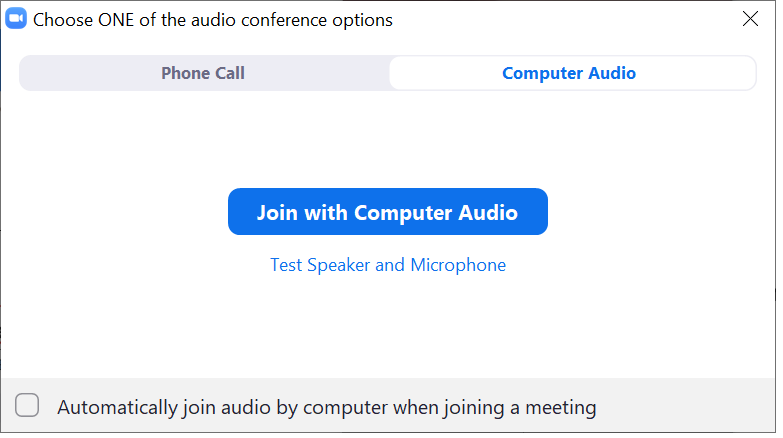
- Click "Join with Computer Audio" to enter the meeting and turn on audio (through the microphone in your head set).
Here are some settings you should familiarize yourself with:
-
Mute/Unmute: Turns your sound on and off.
-
Stop Video/Start Video: Turns your web cam on and off.
-
Security: Opens a security settings menu, including "Lock Meeting", so no one can enter.
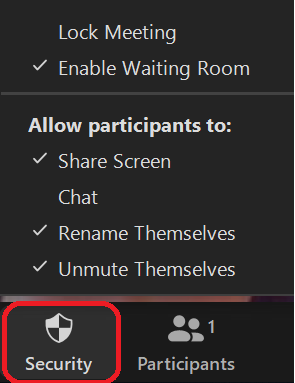
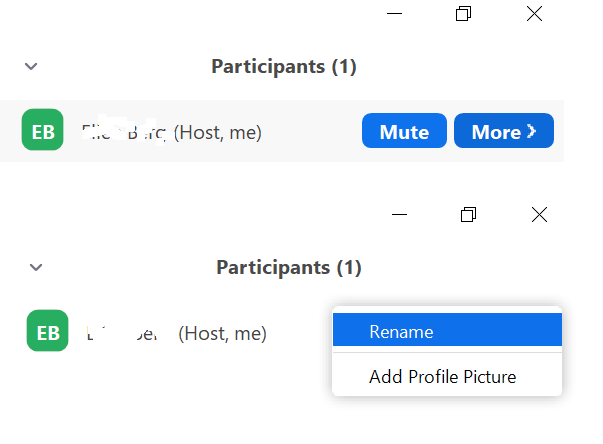
Participants: Allows you to manage the participants in the meeting. If you are a participant, you can change your display name by hovering over your own name, clicking "More" and then "Rename".
- Polls: Allows you to create and share surveys.
- Chat: Opens the chat window.
- Share Screen: Allows you to share a screen or file / application you have up.
- Record: Starts recording of the meeting, see (link to own guide)
- Breakout Rooms: Allows you to create and distribute participants in their own rooms.
- Reactions: Here you can select "Thumbs up" or "Clap" to attach to your video image to show a reaction to what is said in the meeting.
Click "End" and then "End Meeting for All" to end the meeting.
-
Plan a recording in Zoom
NB! If you are recording a meeting in Zoom, you will by default handle personal information.
You must have a relation to the classification of the information you record, see OsloMets rutine for klassifisering av data (Only available in Norwegian) .
The classification will determine where you can store data. See Storage Guide.
You must ensure that you have the necessary legal basis for the recording and that participants are well informed in advance. See, among other things, these routines:
-
OsloMet's privacy policy for live streaming and recording digital teaching sessions
-
For students: privacy policy for live streaming and recording digital teaching sessions
Planning
-
Start the Zoom meeting well in advance of formal meeting start.
-
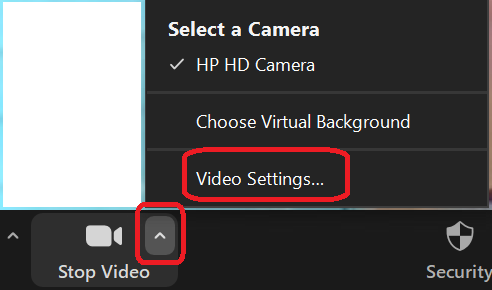
Click the arrow next to the video icon, then "Video Settings".
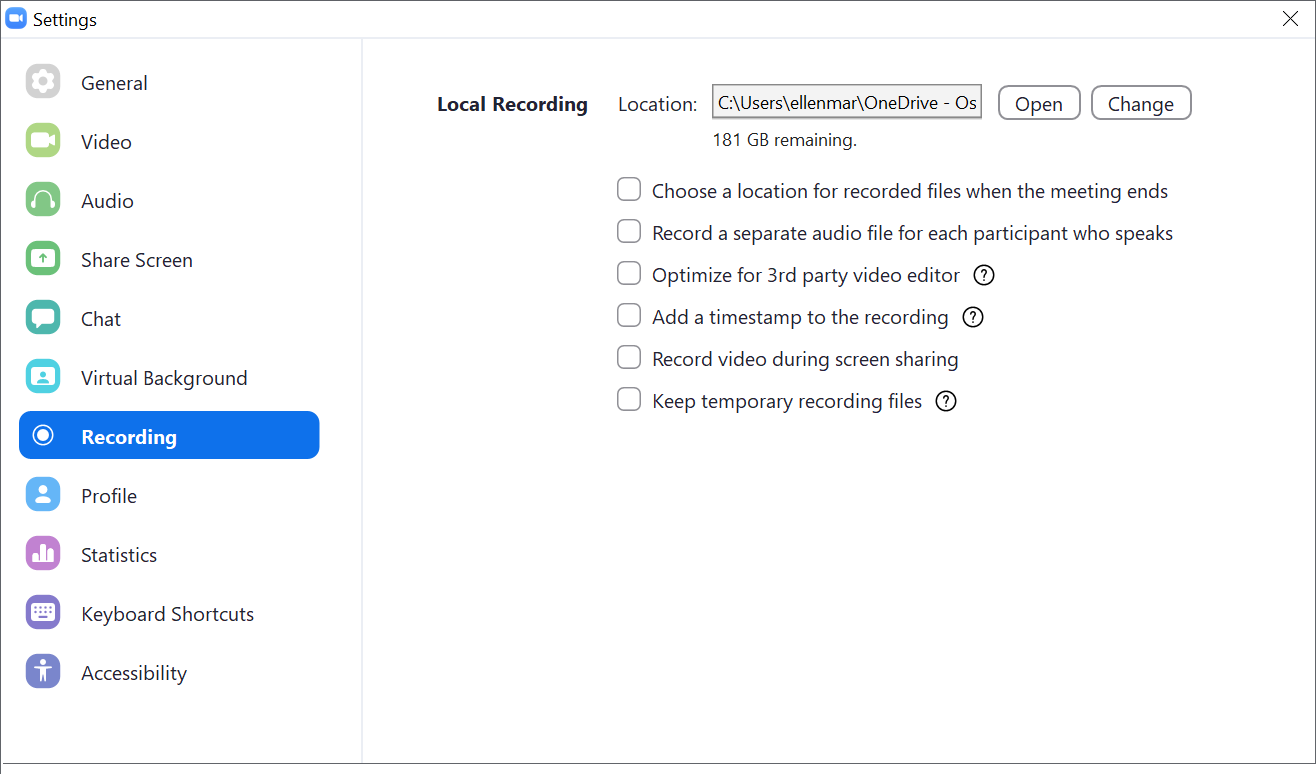
- Click "Recording" in the left menu and make the necessary settings, such as:
- Click "Change" to the right of "Location" to change the recording storage location according to the data classification. Alternatively, you can select "Choose a location for recorded files when the meeting ends", so that you can specify this after downloading the recording.
- Tick off "Record a separate audio file for each participant who speaks" if you want to record a separate audio file per participant.
- Uncheck "Add a timestamp" to the recording if you need to edit it later.
- Make sure "Keep temporary recording files" are not checked to avoid the temporary recording file being stored.
-